- by Lon Naylor
The Easiest Way to Create a Storyboard for your Video

Many people who are new to eLearning want to know how to create a storyboard. Should they use a professional tool? Should they create a template from scratch? What should they put into the template?
Generally, a storyboard for eLearning is a document that specifies the visual elements, text elements, audio elements, interactions and branching (where the system or user will go next) of every screen in an online course. Many people also add the learning objectives to the storyboard.
Storyboarding is typically part of the Development Phase. Start after you’ve done Analysis and Design. In the rapid development approach, however, you may start to storyboard as you are designing.
If you are part of a development team, the storyboard specifies what the graphic designer will create, what the illustrator will draw, what the narrator will say and the interactions that the programmer will produce. The storyboard is usually reviewed by the subject matter expert and your client. It’s the central document of eLearning development.
I prefer a visual approach to storyboarding, so I’ll describe this type of format. Some prefer storyboarding in all text, which may be quicker but may not be as informative. Off the top of my head, I can think of four main ways to go about creating a visual storyboard.
Four Ways to Create a Storyboard
-
Create a template in Word (in landscape mode) and let each page represent one screen.

-
Create a template in PowerPoint and let each slide represent one screen.
-
Create a template in a commercial storyboarding application. There are many of these.
-
For the rapid development approach, begin writing the course directly in the authoring tool, such as PowerPoint. In PowerPoint, you can write the script and other notes in the Notes section below the slide. This integrates storyboarding with actual development.
If you are using Word, just create an area for the storyboard title. Then create the following labeled boxes or regions in your template: 1) a box to represent the screen number in your numbering scheme, 2) a box to represent the screen itself, meaning the visual components of the course, 3) an area for the on-screen text (this can be combined with #2, 4) an area for the audio, 5) an area for the interactions and 6) an area to describe branching. Some people add an area for miscellaneous notes, learning objectives and also for reviewer comments.
Storyboard Template Fields
Fill in the template as follows:
-
Title Area: Add the unit, module, lesson or topic name.
-
Screen Number Area: Enter a unique identifier for each screen. Something like “m1l2s3? for module 1, lesson 2, screen3.
-
Visual Area: Describe in words, sketch or show the visual, such as the graphic, video clip, etc. You can include the text that will be on the screen or make another area for text.
-
Audio Area: Write out the script, the name of a music file and the sound effects that will play on each screen. If you want to be really cool, use the acronym SFX for sound effects.
-
Interaction Area: Describe the interactions that occur on each screen. Take advantage of the medium and provide lots of activities. Specifying these can be tricky and it often helps to write it out in the logic of programming. For example, “If button 1 is clicked, go to screen m1l24” or “If choice 1 is dragged to correct target, display this response.”
-
Branching Area: Define all the system branching that might occur. Branching differs from interactions, as it refers to navigating the whole system. There are standard navigation events, such as Next and Back, as well as more complex branching, such as what happens as a result of a user interaction. For example, you will need to define what happens when a user fails a self-check, clicks on a hyperlinked term or opts to retake a test.
An essential talent for storyboarding one page per screen is squeezing in everything you need. What we really need is a three dimensional storyboard space. Scientists are working on that as we speak.
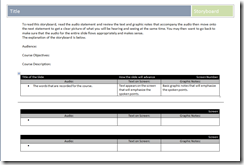
Here’s a basic storyboard template you can use and modify to include the areas above that suit your needs.
We have lots more templates you can use inside the Learn Camtasia course.

